Spring Cloud OpenFeign入门和实战
文章首发:Spring Cloud OpenFeign入门和实战
Feign是一个声明式的Web Service客户端,是一种声明式、模板化的HTTP客户端。而OpenFeign是Spring Cloud 在Feign的基础上支持了Spring MVC的注解,如@RequesMapping等等。
OpenFeign的@FeignClient可以解析SpringMVC的@RequestMapping注解下的接口,并通过动态代理的方式产生实现类,实现类中做负载均衡并调用其他服务。
Feign可以把Rest的请求进行隐藏,伪装成类似SpringMVC的Controller一样。你不用再自己拼接url,拼接参数等等操作,一切都交给Feign去做。
此工程用于存放所有关于openfeign的示例。
pom.xml
<?xml version="1.0" encoding="UTF-8"?><project xmlns="http://maven.apache.org/POM/4.0.0"xmlns:xsi="http://www.w3.org/2001/XMLSchema-instance"xsi:schemaLocation="http://maven.apache.org/POM/4.0.0 http://maven.apache.org/xsd/maven-4.0.0.xsd"><modelVersion>4.0.0</modelVersion><groupId>com.msr.better</groupId><artifactId>cloud-openfeign-practice</artifactId><version>1.0</version><packaging>pom</packaging><parent><groupId>org.springframework.boot</groupId><artifactId>spring-boot-starter-parent</artifactId><version>2.2.3.RELEASE</version><relativePath></relativePath> <!-- lookup parent from repository --></parent><properties><project.build.sourceEncoding>UTF-8</project.build.sourceEncoding><project.reporting.outputEncoding>UTF-8</project.reporting.outputEncoding><java.version>1.8</java.version><spring.cloud-version>Hoxton.SR3</spring.cloud-version></properties><dependencyManagement><dependencies><dependency><groupId>org.springframework.cloud</groupId><artifactId>spring-cloud-dependencies</artifactId><version>${spring.cloud-version}</version><type>pom</type><scope>import</scope></dependency></dependencies></dependencyManagement><dependencies><dependency><groupId>org.springframework.boot</groupId><artifactId>spring-boot-starter-web</artifactId></dependency><dependency><groupId>org.springframework.boot</groupId><artifactId>spring-boot-starter-actuator</artifactId></dependency></dependencies><build><plugins><plugin><groupId>org.springframework.boot</groupId><artifactId>spring-boot-maven-plugin</artifactId></plugin></plugins></build></project>
pom.xml
<dependencies><dependency><groupId>org.springframework.boot</groupId><artifactId>spring-boot-starter-web</artifactId></dependency><dependency><groupId>org.springframework.cloud</groupId><artifactId>spring-cloud-starter-openfeign</artifactId></dependency></dependencies>
配置文件
application.xml
server:port: 8010spring:application:name: openfeign-hello# 日志logging:level:com.msr.better.feign.service.HelloFeignService: debug
配置类
@Configurationpublic class HelloFeignServiceConfig {/*** Logger.Level 的具体级别如下:* NONE:不记录任何信息* BASIC:仅记录请求方法、URL以及响应状态码和执行时间* HEADERS:除了记录 BASIC级别的信息外,还会记录请求和响应的头信息* FULL:记录所有请求与响应的明细,包括头信息、请求体、元数据*/@BeanLogger.Level feignLoggerLevel() {return Logger.Level.FULL;}}
serivce
@FeignClient(name = "github-client", url = "https://api.github.com", configuration = HelloFeignServiceConfig.class)public interface HelloFeignService {/*** content:* {* "message":"Validation Failed",* "errors":[{"resource":"Search","field":"q","code":"missing"}],* "documentation_url":"https://developer.github.com/v3/search"* }** @param queryStr* @return*/@GetMapping(value = "/search/repositories")String searchRepo(@RequestParam("q") String queryStr);}
在上面的HelloFeignService中通过@FeignClient注解手动指定了该接口要访问的URL(https://api.github.com),调用searchGithubRepoByStr方法时,最终会发起GET请求https://api.github.com/search/repositories?q=输入的参数。
controller
@RestControllerpublic class HelloFeignController {@Autowiredprivate HelloFeignService helloFeignService;@GetMapping(value = "/search/github")public String searchGithubRepoByStr(@RequestParam("searchStr") String searchStr) {return helloFeignService.searchRepo(searchStr);}}
启动类
@SpringBootApplication@EnableFeignClientspublic class OpenFeignHelloApplication {public static void main(String[] args) {SpringApplication.run(OpenFeignHelloApplication.class, args);}}
@EnableFeignClients包扫描时,扫描所有@FeignClient。
运行启动类之后,在浏览器或者PostMan之类的工具访问http://localhost:8010/search/github?searchStr=spring-cloud

@Target({ElementType.TYPE})@Retention(RetentionPolicy.RUNTIME)@Documentedpublic @interface FeignClient {...}
从FeignClient的注解可以看得出,ElementType.TYPE说明FeignClient的作用目标是接口。其常用的属性如下:
OpenFeign支持对请求和响应进行GZIP压缩,以此来提供通信效率。只需在配置文件中配置即可,比较简单。
server:port: 8011spring:application:name: openfeign-gziplogging:level:com.msr.better.feign.service.HelloFeignService: debugfeign:# 压缩配置compression:request:enabled: true# 配置压缩支持的MIME TYPEmime-types: text/xml,application/xml,application/jsonmin-request-size: 2048 # 配置压缩数据大小的下限response:enabled: true # 配置响应GZIP压缩
等价的properties配置
feign.compression.request.enabled=true# 配置压缩支持的MIME TYPEfeign.compression.request.mime-types=text/xml,application/xml,application/json# 配置压缩数据大小的下限feign.compression.request.min-request-size=2048# 配置响应GZIP压缩feign.compression.response.enabled=true
@FeignClientde的配置信息可以通过配置文件的方式来配置
server:port: 8011spring:application:name: openfeign-gziplogging:level:com.msr.better.feign.service.HelloFeignService: debugfeign:# 压缩配置compression:request:enabled: true# 配置压缩支持的MIME TYPEmime-types: text/xml,application/xml,application/jsonmin-request-size: 2048 # 配置压缩数据大小的下限response:enabled: true # 配置响应GZIP压缩client:config:# 需要配置的FeignNamegithub-client:# 连接超时时间connectTimout: 5000# 读超时时间readTimeut: 5000# Feign的日志级别loggerLevel: full# Feign的错误解码器errorDecode: com.example.SimpleErrorDecoder# 设置重试retryer: com.example.SimpleRetryer# 拦截前requestInterceptors:- com.example.FirstInterceptor- com.example.SecondInterceptordecode404: false# Feign的编码器encoder: com.example.SimpleEncoder# Feign的解码器decoder: com.example.SimpleDecoder# Feign的contract配置contract: com.example.SimpleContract
在@EnableFeignClients注解上有一个defaultConfiguration属性,可以将默认设置写成一个配置类,例如这个类叫做DefaultFeignClientConfiguration。
@SpringBootApplication@EnableFeignClients(defaultConfiguration = DefaultFeignClientConfiguration.class)public class FeignClientConfigApplication{SpringApplication.run(FeignClientConfigApplication.class, args);}
同时也可以在配置文件中配置
feign:client:config:default:# 连接超时时间connectTimout: 5000# 读超时时间readTimeut: 5000# Feign的日志级别loggerLevel: full...
但是如果以上两种方式(在配置文件和在注解中配置FeignClient的全局配置),最后配置文件会覆盖注解上执行配置类的方式。但是可以在配置文件中添加feign.client.default-to-properties=false来改变Feigin配置的优先级。
其实在上面的就已经是配置了FeignClient的日志了。Feign为每一个Feign都提供了一个fegin.Logger实例。可以在配置中开启日志输出,开启的步骤也很简单。
第一步:在配置文件中配置日志输出
logging:level:# 指定那个FeignClient接口的请求需要输出日志,以及日志级别com.msr.better.feign.service.HelloFeignService: debug
第二步:通过Java代码的方式在主程序入口配置日志Bean
@BeanLogger.Level feignLoggerLevel() {return Logger.Level.FULL;}
又或者通过配置类配置,并在@FeignClient注解中执行改配置类。
@Configurationpublic class HelloFeignServiceConfig {/*** Logger.Level 的具体级别如下:* NONE:不记录任何信息* BASIC:仅记录请求方法、URL以及响应状态码和执行时间* HEADERS:除了记录 BASIC级别的信息外,还会记录请求和响应的头信息* FULL:记录所有请求与响应的明细,包括头信息、请求体、元数据*/@BeanLogger.Level feignLoggerLevel() {return Logger.Level.FULL;}}
Feign的调用分为两层,Ribbon的调用和Hystrix的调用。但是高版本的Hystrix默认是关闭的。一般出现想这样的异常:Read timed out executing POST http://***,是由Ribbon引起,这样可以适当得调大一下Ribbon的超时时间
ribbon:ConnectTimeout: 2000ReadTimeout: 5000
HystrixRuntimeException: XXX timed -out and no fallback available .这就是Hystrix的超时报错
feign:hystrix:enabled: true# 设置hystrix超时时间hystrix:shareSecurityContext: truecommand:default:circuitBreaker:sleepWindowinMilliseconds: 10000forceClosed: trueexecution:isolation:thread:timeoutinMilliseconds: 10000
Feign默认是使用JDK原生的URLConnection发送HTTP请求,没有连接池,但是对每个地址会保持一个长连接,就是利用HTTP的persistence connection.。这样可以使用其他优秀的Client去替换。这样可以设置连接池,超时时间等对服务之间的调用调优。下面介绍使用Http Client和Okhttp替换Feign默认的Client。步骤也很简单。
pom.xml
<dependencies><dependency><groupId>org.springframework.boot</groupId><artifactId>spring-boot-starter-web</artifactId></dependency><!-- Spring Cloud OpenFeign的Starter的依赖 --><dependency><groupId>org.springframework.cloud</groupId><artifactId>spring-cloud-starter-openfeign</artifactId></dependency><!-- 使用Apache HttpClient替换Feign原生httpclient --><dependency><groupId>org.apache.httpcomponents</groupId><artifactId>httpclient</artifactId></dependency><dependency><groupId>io.github.openfeign</groupId><artifactId>feign-httpclient</artifactId></dependency></dependencies>
application.yml
server:port: 8010spring:application:name: openfeign-httpclientfeign:httpclient:enabled: true
关于Http Client的一些配置也是可以在配置文件中配置的

在org.springframework.cloud.openfeign.clientconfig.HttpClientFeignConfiguration中是关于HttpClient的配置:
@Configuration(proxyBeanMethods = false)@ConditionalOnMissingBean({CloseableHttpClient.class})public class HttpClientFeignConfiguration {private final Timer connectionManagerTimer = new Timer("FeignApacheHttpClientConfiguration.connectionManagerTimer", true);private CloseableHttpClient httpClient;@Autowired(required = false)private RegistryBuilder registryBuilder;public HttpClientFeignConfiguration() {}@Bean@ConditionalOnMissingBean({HttpClientConnectionManager.class})public HttpClientConnectionManager connectionManager(ApacheHttpClientConnectionManagerFactory connectionManagerFactory, FeignHttpClientProperties httpClientProperties) {final HttpClientConnectionManager connectionManager = connectionManagerFactory.newConnectionManager(httpClientProperties.isDisableSslValidation(), httpClientProperties.getMaxConnections(), httpClientProperties.getMaxConnectionsPerRoute(), httpClientProperties.getTimeToLive(), httpClientProperties.getTimeToLiveUnit(), this.registryBuilder);this.connectionManagerTimer.schedule(new TimerTask() {public void run() {connectionManager.closeExpiredConnections();}}, 30000L, (long)httpClientProperties.getConnectionTimerRepeat());return connectionManager;}@Bean@ConditionalOnProperty(value = {"feign.compression.response.enabled"},havingValue = "true")public CloseableHttpClient customHttpClient(HttpClientConnectionManager httpClientConnectionManager, FeignHttpClientProperties httpClientProperties) {HttpClientBuilder builder = HttpClientBuilder.create().disableCookieManagement().useSystemProperties();this.httpClient = this.createClient(builder, httpClientConnectionManager, httpClientProperties);return this.httpClient;}@Bean@ConditionalOnProperty(value = {"feign.compression.response.enabled"},havingValue = "false",matchIfMissing = true)public CloseableHttpClient httpClient(ApacheHttpClientFactory httpClientFactory, HttpClientConnectionManager httpClientConnectionManager, FeignHttpClientProperties httpClientProperties) {this.httpClient = this.createClient(httpClientFactory.createBuilder(), httpClientConnectionManager, httpClientProperties);return this.httpClient;}private CloseableHttpClient createClient(HttpClientBuilder builder, HttpClientConnectionManager httpClientConnectionManager, FeignHttpClientProperties httpClientProperties) {RequestConfig defaultRequestConfig = RequestConfig.custom().setConnectTimeout(httpClientProperties.getConnectionTimeout()).setRedirectsEnabled(httpClientProperties.isFollowRedirects()).build();CloseableHttpClient httpClient = builder.setDefaultRequestConfig(defaultRequestConfig).setConnectionManager(httpClientConnectionManager).build();return httpClient;}@PreDestroypublic void destroy() throws Exception {this.connectionManagerTimer.cancel();if (this.httpClient != null) {this.httpClient.close();}}}
很明显当没有CloseableHttpClient这个bean的时候,就是会由这个类来生成Http Client的默认配置。所以说对于HttpClient的自定义配置可以通过自己注入CloseableHttpClient。还有HttpClientConnectionManager管理连接的bean。其实OpenFeign对HttpClient的支持很好,因为它的一些属性可以在配置文件中配置。
其实和Http Client一样的配置,也是在配置文件中开启
pom.xml
<dependencies><dependency><groupId>org.springframework.boot</groupId><artifactId>spring-boot-starter-web</artifactId></dependency><!-- Spring Cloud OpenFeign的Starter的依赖 --><dependency><groupId>org.springframework.cloud</groupId><artifactId>spring-cloud-starter-openfeign</artifactId></dependency><dependency><groupId>io.github.openfeign</groupId><artifactId>feign-okhttp</artifactId></dependency></dependencies>
application.yml
server:port: 8011spring:application:name: openfeign-okhttpfeign:okhttp:enabled: true# 日志logging:level:com.msr.better.feign.service.HelloFeignService: debug
这样开启之后,Client就被替换了。同理在org.springframework.cloud.openfeign.clientconfig包下,也有一个关于Okhttp的配置类。
@Configuration(proxyBeanMethods = false)@ConditionalOnMissingBean({OkHttpClient.class})public class OkHttpFeignConfiguration {private OkHttpClient okHttpClient;public OkHttpFeignConfiguration() {}@Bean@ConditionalOnMissingBean({ConnectionPool.class})public ConnectionPool httpClientConnectionPool(FeignHttpClientProperties httpClientProperties, OkHttpClientConnectionPoolFactory connectionPoolFactory) {Integer maxTotalConnections = httpClientProperties.getMaxConnections();Long timeToLive = httpClientProperties.getTimeToLive();TimeUnit ttlUnit = httpClientProperties.getTimeToLiveUnit();return connectionPoolFactory.create(maxTotalConnections, timeToLive, ttlUnit);}@Beanpublic OkHttpClient client(OkHttpClientFactory httpClientFactory, ConnectionPool connectionPool, FeignHttpClientProperties httpClientProperties) {Boolean followRedirects = httpClientProperties.isFollowRedirects();Integer connectTimeout = httpClientProperties.getConnectionTimeout();this.okHttpClient = httpClientFactory.createBuilder(httpClientProperties.isDisableSslValidation()).connectTimeout((long)connectTimeout, TimeUnit.MILLISECONDS).followRedirects(followRedirects).connectionPool(connectionPool).build();return this.okHttpClient;}@PreDestroypublic void destroy() {if (this.okHttpClient != null) {this.okHttpClient.dispatcher().executorService().shutdown();this.okHttpClient.connectionPool().evictAll();}}}
很明显OkHttpClient是核心功能执行的类。因为OpenFeign中有一个类FeignHttpClientProperties,有了这个类关于HttpClient的属性就可以在配置文件中设置了。但是Okhttp没有这一个类似的类,所以一般可以自己注入一个OkHttpClient去设置这些属性
@Configuration@ConditionalOnClass(Feign.class)@AutoConfigureBefore(FeignAutoConfiguration.class)public class OkHttpConfig {@Beanpublic okhttp3.OkHttpClient okHttpClient() {return new okhttp3.OkHttpClient.Builder()//设置连接超时.connectTimeout(60, TimeUnit.SECONDS)//设置读超时.readTimeout(60, TimeUnit.SECONDS)//设置写超时.writeTimeout(60, TimeUnit.SECONDS)//是否自动重连.retryOnConnectionFailure(true).connectionPool(new ConnectionPool())//构建OkHttpClient对象.build();}}
关于自定义OkHttpClient的配置,可以参考OpenFeign里OkHttpFeignConfiguration的配置,例如ConnectionPool这个bean。
在使用OpenFeign实现服务之间的调用时,很多时候是要传递多个参数。
Eureka Server注册中心
<dependencies><dependency><groupId>org.springframework.cloud</groupId><artifactId>spring-cloud-starter-netflix-eureka-server</artifactId></dependency><dependency><groupId>org.springframework.boot</groupId><artifactId>spring-boot-starter-actuator</artifactId></dependency><!-- springboot web --><dependency><groupId>org.springframework.boot</groupId><artifactId>spring-boot-starter-web</artifactId><exclusions><exclusion><artifactId>spring-boot-starter-tomcat</artifactId><groupId>org.springframework.boot</groupId></exclusion></exclusions></dependency><!--不用Tomcat,使用undertow --><dependency><groupId>org.springframework.boot</groupId><artifactId>spring-boot-starter-undertow</artifactId></dependency><dependency><groupId>io.undertow</groupId><artifactId>undertow-servlet</artifactId></dependency></dependencies>
配置文件application.yml
server:port: 8761eureka:instance:hostname: localhostserver :enable-self-preservation: falseclient:registerWithEureka: falsefetchRegistry: falseserviceUrl:defaultZone: http://${eureka.instance.hostname}:${server.port}/eureka/
启动类
@SpringBootApplication@EnableEurekaServerpublic class EurekaApplication {public static void main(String[] args) {SpringApplication.run(EurekaApplication.class, args);}}
服务提提供者
<dependencies><dependency><groupId>org.springframework.cloud</groupId><artifactId>spring-cloud-starter-netflix-eureka-client</artifactId></dependency><dependency><groupId>org.springframework.boot</groupId><artifactId>spring-boot-starter-web</artifactId></dependency><dependency><groupId>org.springframework.cloud</groupId><artifactId>spring-cloud-starter-openfeign</artifactId></dependency></dependencies>
配置文件application.yml
server:port: 8012spring:application:name: openfeign-providereureka:client:serviceUrl:defaultZone: http://localhost:8761/eureka/#eureka.instance.prefer-ip-address 表示将自己的IP注册到Eureka Server上,#如果不配置,会将当前服务提供者所在的主机名注册到Eureka Server上。instance:prefer-ip-address: true
实体类和控制器
public class Order {private Long id;private String name;private int age;public Long getId() {return id;}public void setId(Long id) {this.id = id;}public String getName() {return name;}public void setName(String name) {this.name = name;}public int getAge() {return age;}public void setAge(int age) {this.age = age;}}
@RestController@RequestMapping("/order")public class OrderController {@GetMapping(value = "/add")public String addUser(Order order, HttpServletRequest request) {String token = request.getHeader("oauthToken");return "hello," + order.getName();}@PostMapping(value = "/update")public String updateUser(@RequestBody Order order) {return "hello," + order.getName();}}
启动类
@SpringBootApplication@EnableDiscoveryClientpublic class ProviderApplication {public static void main(String[] args) {SpringApplication.run(ProviderApplication.class, args);}}
消费者服务
<dependencies><dependency><groupId>org.springframework.cloud</groupId><artifactId>spring-cloud-starter-netflix-eureka-client</artifactId></dependency><dependency><groupId>org.springframework.boot</groupId><artifactId>spring-boot-starter-web</artifactId></dependency><dependency><groupId>org.springframework.cloud</groupId><artifactId>spring-cloud-starter-openfeign</artifactId></dependency><!-- 使用Apache HttpClient替换Feign原生httpclient --><dependency><groupId>org.apache.httpcomponents</groupId><artifactId>httpclient</artifactId></dependency><dependency><groupId>io.github.openfeign</groupId><artifactId>feign-httpclient</artifactId></dependency></dependencies>
配置文件application.yml
server:port: 8011spring:application:name: openfeign-consumereureka:client:service-url:defaultZone: http://localhost:8761/eurekafeign:httpclient:enabled: true
实体类
package com.msr.better.feign.model;public class Order {private Long id;private String name;private int nums;// 此处省略了getter和setter}
FeignClient接口
@FeignClient("openfeign-provider")public interface OrderApiService {@GetMapping(value = "/order/add")String addUser(@SpringQueryMap Order order);@PostMapping(value = "/order/update")String updateUser(@RequestBody Order order);}
此处的Client接口中对于GET请求传递实体类使用了注解@SpringQueryMap。OpenFeign@QueryMap批注支持将POJO用作GET参数映射。但是默认的OpenFeign QueryMap注释与Spring不兼容,因为它缺少value属性。
Spring Cloud OpenFeign提供了等效的@SpringQueryMap注释,该注释用于将POJO或Map参数注释为查询参数映射。
在一些资料中说什么OpenFeign的什么GET不能传递POJO,写了个拦截器把实体类转换了,估计是OpenFeign的版本低,在新的OpenFeign中是有了对QueryMap的支持了。
配置类
@Configurationpublic class CoreAutoConfiguration {@Autowiredprivate HttpClient httpClient;@Beanpublic HttpComponentsClientHttpRequestFactory httpComponentsClientHttpRequestFactory() {HttpComponentsClientHttpRequestFactory factory = new HttpComponentsClientHttpRequestFactory();factory.setHttpClient(httpClient);factory.setReadTimeout(3000);factory.setConnectTimeout(3000);factory.setConnectionRequestTimeout(3000);return factory;}/*** {@link RestTemplate }的setRequestFactory方法支持HttpClient和Okhttp等Client* 默认是使用{@link SimpleClientHttpRequestFactory } Http的请求是使用原生的URLConnection** @return RestTemplate的bean*/@LoadBalanced@Beanpublic RestTemplate restTemplate() {RestTemplate restTemplate = new RestTemplate();restTemplate.setRequestFactory(httpComponentsClientHttpRequestFactory());return restTemplate;}}
上面是替换了RestTemplate的Client。因为RestTemplate默认是使用URLConnection。这里是使用HttpClient替换了。
控制器
@RestController@RequestMapping("api")public class OrderController {@Autowiredprivate OrderApiService orderApiService;/*** @param order* @return*/@PostMapping("/get/pojo")public String getPojo(@RequestBody Order order) {return orderApiService.addUser(order);}@PostMapping("/post/pojo")String postPojo(@RequestBody Order order){return orderApiService.updateUser(order);}}
最后就可以测试http://localhost:8011/get/pojo和http://localhost:8011/post/pojo了。
继续使用上一节创建的Eureka Server。然后创建一下两个模块用作文件上传。
想要实现文件上传功能,需要编写Encoder去实现文件上传。现在OpenFeign提供了子项目feign-form(https://github.com/OpenFeign/feign-form)
文件上传接口的提供者
<dependencies><dependency><groupId>org.springframework.boot</groupId><artifactId>spring-boot-starter-web</artifactId></dependency><dependency><groupId>org.springframework.cloud</groupId><artifactId>spring-cloud-starter-netflix-eureka-client</artifactId></dependency></dependencies>
配置文件application.yml
server:port: 8012spring:application:name: openfeign-file-servereureka:server:enableSelfPreservation: falseclient:serviceUrl:defaultZone: http://localhost:8761/eureka/instance:prefer-ip-address: true
启动类
@SpringBootApplication@EnableDiscoveryClientpublic class UploadServerApplication {public static void main(String[] args) {SpringApplication.run(UploadServerApplication.class, args);}}
上传接口
@RestControllerpublic class FileController {@PostMapping(value = "/uploadFile/server", consumes = MediaType.MULTIPART_FORM_DATA_VALUE)public String fileUploadServer(MultipartFile file) {// save file and return file addressreturn "http://localhost/" + file.getOriginalFilename();}}
文件上传接口的调用者
<dependencies><dependency><groupId>org.springframework.boot</groupId><artifactId>spring-boot-starter-web</artifactId></dependency><dependency><groupId>org.springframework.cloud</groupId><artifactId>spring-cloud-starter-netflix-eureka-client</artifactId></dependency><!-- Spring Cloud OpenFeign的Starter的依赖 --><dependency><groupId>org.springframework.cloud</groupId><artifactId>spring-cloud-starter-openfeign</artifactId></dependency><!-- Feign文件上传依赖--><dependency><groupId>io.github.openfeign.form</groupId><artifactId>feign-form</artifactId><version>3.8.0</version></dependency><dependency><groupId>io.github.openfeign.form</groupId><artifactId>feign-form-spring</artifactId></dependency></dependencies>
配置文件application.yml
server:port: 8011spring:application:name: openfeign-upload-clienteureka:client:service-url:defaultZone: http://localhost:8761/eureka
启动类:
@SpringBootApplication@EnableDiscoveryClient@EnableFeignClientspublic class UploadClientApplication {public static void main(String[] args) {SpringApplication.run(UploadClientApplication.class, args);}}
配置类
@Configurationpublic class FeignMultipartSupportConfig {@Bean@Primary@Scope("prototype")public Encoder multipartFormEncoder() {return new SpringFormEncoder();}}
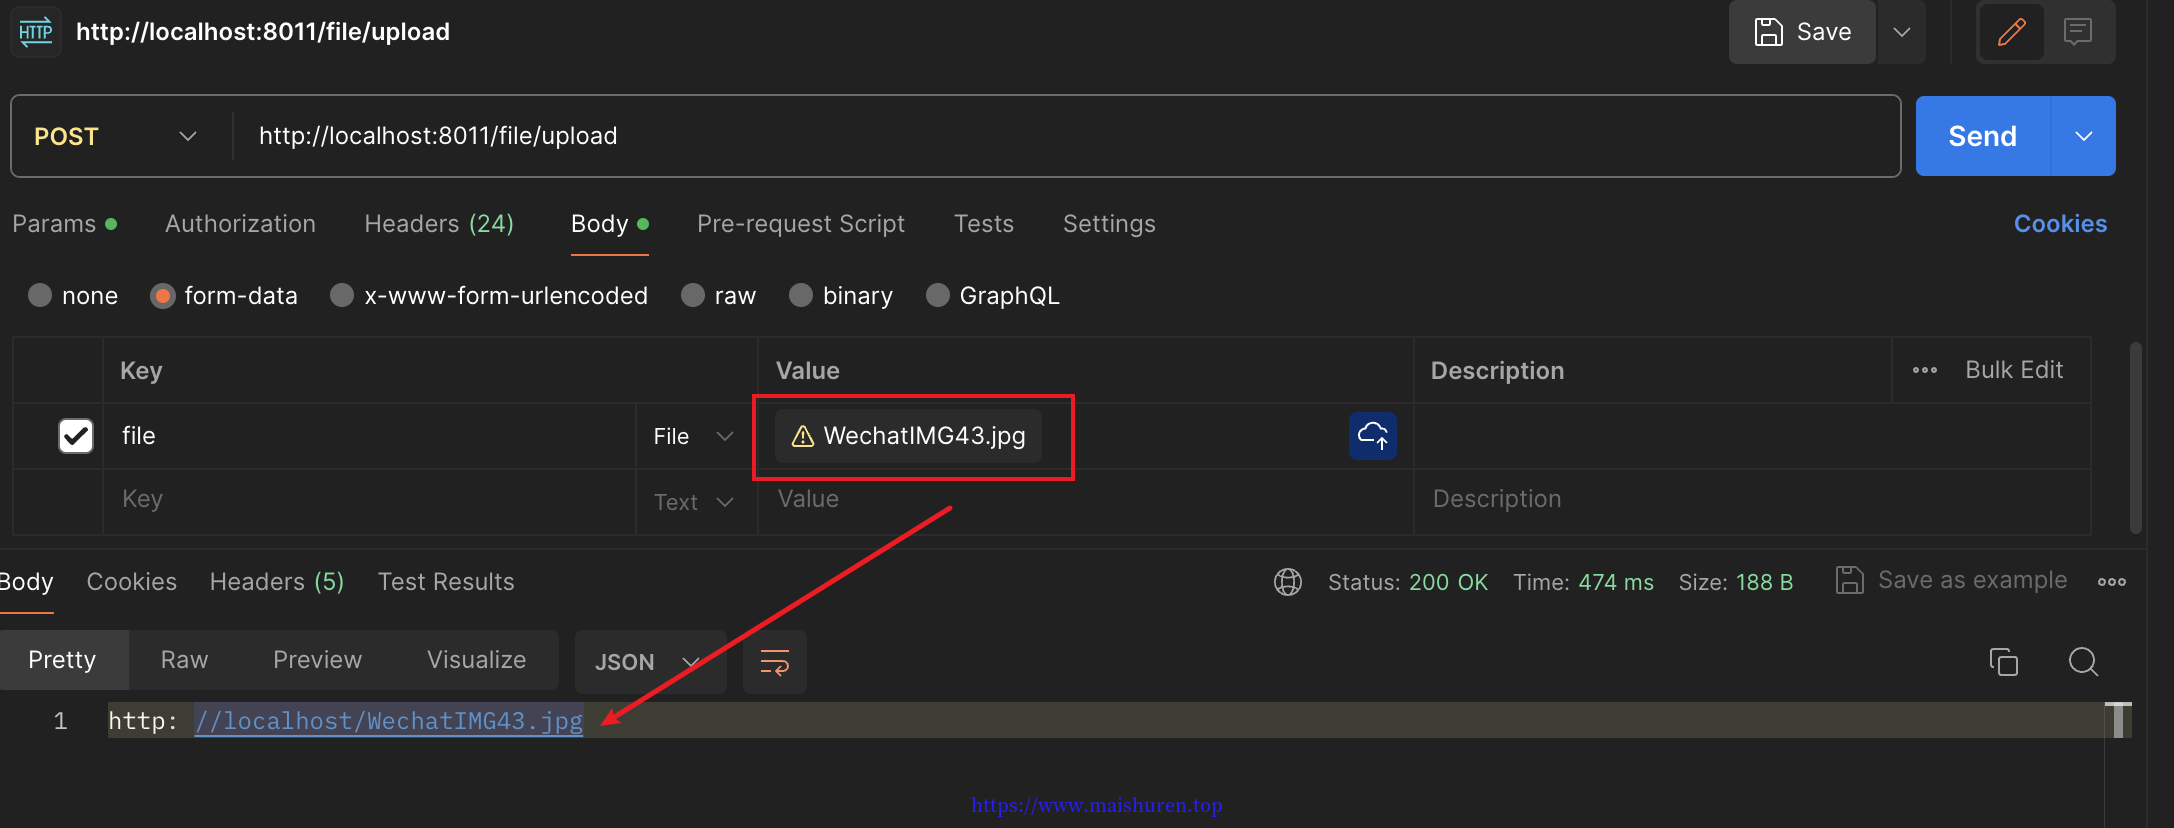
控制器
@RestController@RequestMapping("file")public class FeignUploadController {@Autowiredprivate FileUploadApiService fileUploadApiService;@PostMapping(value = "/upload", consumes = MediaType.MULTIPART_FORM_DATA_VALUE)public String imageUpload(MultipartFile file) throws Exception {return fileUploadApiService.fileUpload(file);}}
FeignClient
@FeignClient(value = "openfeign-file-server", configuration = FeignMultipartSupportConfig.class)public interface FileUploadApiService {/**** 1.produces,consumes必填* 2.注意区分@RequestPart和RequestParam,不要将* @RequestPart(value = "file") 写成@RequestParam(value = "file")* @param file* @return*/@PostMapping(value = "/uploadFile/server",produces = {MediaType.APPLICATION_JSON_UTF8_VALUE},consumes = MediaType.MULTIPART_FORM_DATA_VALUE)String fileUpload(@RequestPart(value = "file") MultipartFile file);}
由于OpenFeign整合了Ribbon和Hystrix,可能会出现首次调用失败的问题。
主要原因是:Hystrix默认的超时时间是1秒,如果超过这个时间没有响应,就会进入fallback代码。由于Bean的装配和懒加载的机制,Feign首次请求都会比较慢。如此一来当响应时间大于1秒就会进入fallback而导致请求失败。解决方法:
将Hystrix的超时时间调大,此方法比较好
hystrix:command:default:execution:isolation:thread:timeoutInMillseconds: 5000 # 5秒
禁用Hystrix的超时时间
hystrix:command:default:execution:timout:enable: false
使用Feign的时候关闭Hystrix,这是不推荐的
feign:hystrix:enable: false
对于返回的是图片,一般都是字节数组。但是Contrller不能直接返回byte,所以被调用的API返回的类型应该使用Response。
使用上面的文件上传创建的模块中添加一个返回图片的接口。以生成一个二维码为例。
添加新的依赖,使用hutool快速生成二维码
<dependency><groupId>cn.hutool</groupId><artifactId>hutool-all</artifactId><version>5.6.3</version></dependency><dependency><groupId>com.google.zxing</groupId><artifactId>core</artifactId><version>3.3.3</version></dependency><dependency><groupId>io.github.openfeign</groupId><artifactId>feign-core</artifactId></dependency>
controller的接口,这里仅简单的生成了一个二维码,二维码还可以添加更加多的信息。这里就不详细介绍,hutool的QrCodeUtil有很多方法,有兴趣的可以自行研究。
@GetMapping(value = "/qrcode")public byte[] image() {return generateQrCode();}/*** 先简单的生成一个url的二维码,指向百度* @return*/private byte[] generateQrCode() {return QrCodeUtil.generatePng("https://www.baidu.cn/", 300, 300);}
添加新依赖
<dependency><groupId>commons-io</groupId><artifactId>commons-io</artifactId><version>2.6</version></dependency>
feignclient添加新接口
@GetMapping("/qrcode")Response getQrCode();
controller的修改,对于要在前端页面显示图片,一般用的最多的是返回页面一个url,但是这都是存储好的图片,但是每次生成验证码和二维码这些,服务端可能并不会存储起来。所以并不能返回一个url地址,对于验证码用的返回前端Base64编码。二维码的话可以基于HttpServletResponse,produces返回字节流和Base64图片。
这里使用HttpServletResponse,添加方法:
@GetMapping("/qrcode")public void getQrCode(HttpServletResponse response) {Response res = fileUploadApiService.getQrCode();try {InputStream inputStream = res.body().asInputStream();response.setContentType(MediaType.IMAGE_PNG_VALUE);IOUtils.copy(inputStream,response.getOutputStream());} catch (IOException e) {e.printStackTrace();}}
浏览器访问:http://localhost:8011/file/qrcode,结果

正常的来说,系统都是有认证鉴权的功能,不管是JWT还是security,在外部请求到A服务时,是带有token过来的,但是此请求在A服务内部通过Feign调用B服务时,就会发生token的丢失。
解决方法也是不难,就是在使用Feign远程调用时,在请求头里携带一下token,一般token是放在请求头里面。
Feign提供的拦截器RequestInterceptor,这样可以拦截Feign的请求,在请求头里添加token。对于这部分代码,在cloud-openfeign-consumer和cloud-openfeign-provider上进行添加。
修改一下方法,便于展示结果
@PostMapping(value = "/update")public String updateOrder(@RequestBody Order order, HttpServletRequest request) {String token = request.getHeader("token");return "hello," + order.getName() + " " + "haha!I get a token: " + token;}
添加拦截器实现feign.RequestInterceptor
@Componentpublic class FeignTokenInterceptor implements RequestInterceptor {@Overridepublic void apply(RequestTemplate requestTemplate) {if (null == getHttpServletRequest()) {//此处可以记录一些日志return;}//将获取Token对应的值往下面传requestTemplate.header("token", getHeaders(getHttpServletRequest()).get("token"));}private HttpServletRequest getHttpServletRequest() {try {return ((ServletRequestAttributes) RequestContextHolder.getRequestAttributes()).getRequest();} catch (Exception e) {return null;}}/*** Feign拦截器拦截请求获取Token对应的值** @param request* @return*/private Map<String, String> getHeaders(HttpServletRequest request) {Map<String, String> map = new LinkedHashMap<>();Enumeration<String> enumeration = request.getHeaderNames();while (enumeration.hasMoreElements()) {String key = enumeration.nextElement();String value = request.getHeader(key);map.put(key, value);}return map;}}
最后启动服务就可以开始测试了,测试结果:

本文介绍了一些Feign的用法,后续如果有关于Feign新的东西将会新开文章述说。