Cpatcha solver for 1p3a 一畝三分地的驗證碼辨識CNN
CNN model for 1p3a captcha solving using small dataset (100 captcha images).
Model Accuracy : 100% on 268/111 training/validation sets.
Test Accuracy:100% on 90 test images.
| Package | Version |
|---|---|
| requests | 2.23.0 |
| numpy | 1.18.1 |
| matplotlib | 3.1.3 |
| tensorflow | 2.0.0 |
| opencv | 3.4.2 |
python creat_training_sets.py to slice a captcha image to four single character imagescaptcha_train.csvand then python train.pypython test.py will compare results with captcha_test.csv | File name | Description |
|---|---|
| create_training_sets.py | convert a captcha image to four single character images |
| train.py | create model and train |
| test.py | load model and test |
| utils.py | image processing and segmentation |
| Folder name | Description |
|---|---|
| res_model | trained model |
| verify_img | original captcha images. (train: 0-69 valid: 70-99 test: 100-189) |
| train_data | segmented images for training |
| valid_data | segmented images for validation |
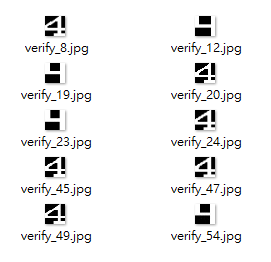
Collect 100 images from target website.
Refer: function crack_verify in auto_1p3a.py to save the image:
res = self.session.get(url)with open("img.jpg", 'wb') as fp:fp.write(res.content)
Or use selenium to crop the screen shot.
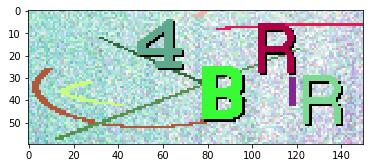
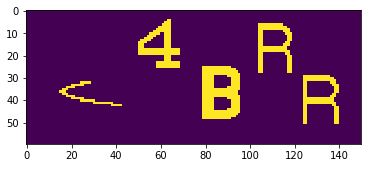
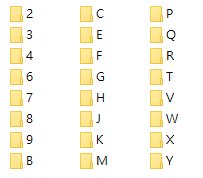
We can see each charater is composed by a same color.
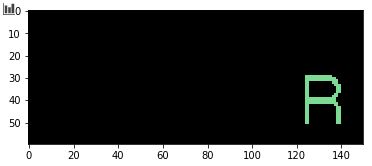
Now we have 12 color seperate images in the stack.
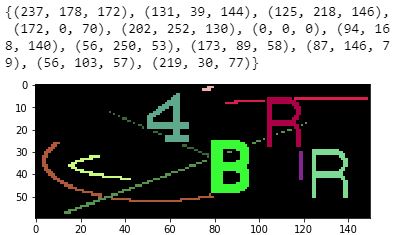
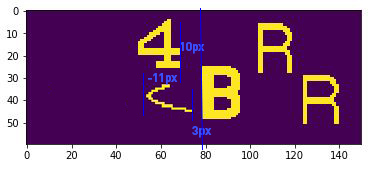
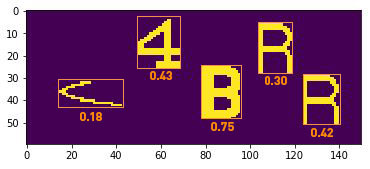
cv2.findContours for each image. If the contour fits our criteria, where number of contour == 1, area (w*h) between 150-600, w<30, h<30, we will record its x,y,w,h, and color pixel percentage in a rectangle list.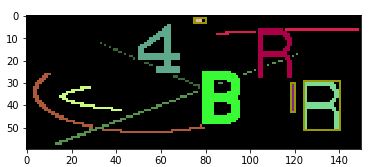

However, for example, if the boxes look like the image below, 4 and the outlier overlaped because of distance -11px. Later, we decide which one has a normal distance with B, then we keep it, which in here is 4.
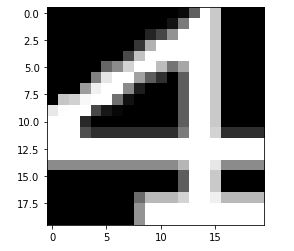
After resizing, they looks similar:
We use the model and the structure from here :
https://github.com/JasonLiTW/simple-railway-captcha-solver/blob/master/README.md
with batch size=40, epochs=300, and train data shuffling.
And the output layer was modified to single digit ouput.
_________________________________________________________________Layer (type) Output Shape Param #=================================================================input_1 (InputLayer) [(None, 20, 20, 1)] 0_________________________________________________________________conv2d (Conv2D) (None, 20, 20, 32) 320_________________________________________________________________conv2d_1 (Conv2D) (None, 18, 18, 32) 9248_________________________________________________________________batch_normalization (BatchNo (None, 18, 18, 32) 128_________________________________________________________________max_pooling2d (MaxPooling2D) (None, 9, 9, 32) 0_________________________________________________________________dropout (Dropout) (None, 9, 9, 32) 0_________________________________________________________________conv2d_2 (Conv2D) (None, 9, 9, 64) 18496_________________________________________________________________conv2d_3 (Conv2D) (None, 7, 7, 64) 36928_________________________________________________________________batch_normalization_1 (Batch (None, 7, 7, 64) 256_________________________________________________________________max_pooling2d_1 (MaxPooling2 (None, 3, 3, 64) 0_________________________________________________________________dropout_1 (Dropout) (None, 3, 3, 64) 0_________________________________________________________________conv2d_4 (Conv2D) (None, 3, 3, 128) 73856_________________________________________________________________conv2d_5 (Conv2D) (None, 1, 1, 128) 147584_________________________________________________________________batch_normalization_2 (Batch (None, 1, 1, 128) 512_________________________________________________________________max_pooling2d_2 (MaxPooling2 (None, 1, 1, 128) 0_________________________________________________________________dropout_2 (Dropout) (None, 1, 1, 128) 0_________________________________________________________________conv2d_6 (Conv2D) (None, 1, 1, 256) 33024_________________________________________________________________batch_normalization_3 (Batch (None, 1, 1, 256) 1024_________________________________________________________________max_pooling2d_3 (MaxPooling2 (None, 1, 1, 256) 0_________________________________________________________________flatten (Flatten) (None, 256) 0_________________________________________________________________dropout_3 (Dropout) (None, 256) 0_________________________________________________________________digit (Dense) (None, 37) 9509=================================================================Total params: 330,885Trainable params: 329,925Non-trainable params: 960
Note: I manually pick some cases into the train folder to let data more balance. If you generate train and valid data from verify_img, you’ll find the number of files are different.
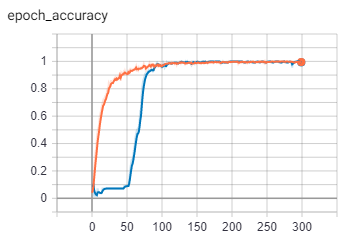
Approximately after 150 epochs, acc and val_acc will be 100%.

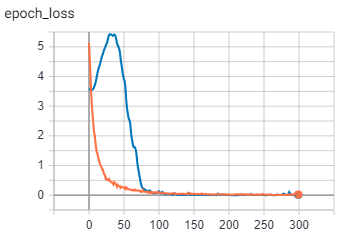
Accuracy: (Orange- Train Blue-Validation)
Loss:
Using no.100-189 for testing.
If we use the simple railway captcha solver for 4 digits, the 100 images are not enough for training:
- 0s - loss: 0.0524 - digit1_loss: 0.0088 - digit2_loss: 0.0215 - digit3_loss: 0.0046 - digit4_loss: 0.0176 -digit1_acc: 1.0000 - digit2_acc: 1.0000 - digit3_acc: 1.0000 - digit4_acc: 1.0000 -val_loss: 31.2516 - val_digit1_loss: 7.0900 - val_digit2_loss: 8.6135 - val_digit3_loss: 7.3375 - val_digit4_loss: 8.2105 -val_digit1_acc: 0.1333 - val_digit2_acc: 0.0667 - val_digit3_acc: 0.0667 - val_digit4_acc: 0.0667
Therefore, I tried to segment one image to four character images, and the result improved:
Epoch 100/100- 1s - loss: 0.1641 - acc: 0.9438 - val_loss: 0.5276 - val_acc: 0.9038
Then I tried the data augmentation for hue change (as function hueChange(image) in utils.py), it improved a little bit :
Epoch 50/50- 165s 620ms/step - loss: 1.4040e-04 - acc: 1.0000 - val_loss: 0.4662 - val_acc: 0.9712
However, since the improvement is unsignificant and extend the training time, I decided to turn these color images to gray images.